So, there's a neat tutorial by Deke McClelland that shows how to make a photo look like an engraved image. I was playing with it, and I realized that by tweaking it just a tiny bit, the "drawings" created by the process could look a lot more, well, drawn. This tutorial lifts TONS of the original method from McClelland's. If something you read here doesn't make sense, check his tutorial out- it's probably much clearer than mine.
First, find a good starter image. This one is a face I found on stock.xchng, a free stock photo site. I shrank it to fit here.

Copy the image to a new layer, and apply the photocopy filter. You want solid lines to define the edges of your "drawing." McClelland says to set the darkness to 50 and the detail around 8 or 9, but I've had good results with much lower numbers. This one was set at a detail level of 5:

Set the layer mode to Multiply to see the two layers together.

Now we need to get rid of everything that isn't a clean line. McClelland uses a nifty trick with blur and levels to do a lot of the grunt work. first, use gaussian blur with the radius set to 2 pixels to make the layer fuzzy. The use the levels command. Set the levels really close together, something like this:
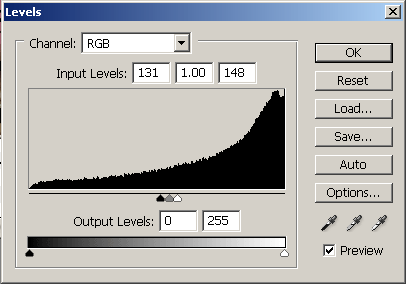
Your exact positions for the levels will probably be different- you'll have to find the right range for each image. When you're done, the image is much cleaner, but still grubby:

Now go through and manually cut out the lumps that are left. It might take a while. The rougher your original image, the more lumps you will have. This guy's face is really textured, so I've got a bunch. When you're don, the image will look much cleaner:

Now create a new layer between the original picture and the lines and fill it with white (McClelland made a mistake here- he said alt-backspace would fill with white, but he meant ctrl-backspace. You could also use alt-f5 and fill with white). Your lines will be visible:

Set the middle layer's opacity to 50%:

Make a new layer above the white one and fill it with black (either with alt-backspace or with alt-f5 and choosing black. In the layer palette, double click to the left of the layer name to get the layer styles box. You're going to adjust the blend underlying layer to fill in your balcks. McClelland says use a value of 160, but you'll find that the actual value is different for each image. Here's where the slider is (it took me FOREVER to find it the first time I tried to do this):

The image's blacks should be filled in:

At this point, McClelland uses seamless patterns of lines set at 45 degree angles to imitate the look of a mechanical engraving. However, by making those patterns a little less rigid, it's pretty easy to make them look more like hand drawn lines.
First we need to make some seamless tiles. Choose fairly large dimensions. Also, choosing oddball sizes makes the repitition of the overlapping patterns less obvious. my first tile is 97 x 149. Use ctrl-0 to make the tile fill the screen, and turn on the grid (view/show/grid). Here's my blank tile:

With the pencil tool, draw some curvy lines that start from the top edge of the image at a gridline and end on the opposite side on a different gridline without crossing any other line you've drawn. Do this until it's impossible to avoid crossing lines (here, my pencil is set at five pixels wide, but experiment with different widths).

Now use the offset filter (filter/other/offset)- set the values to anything other than zero. when the image shifts, look for any breaks in the pattern and repair them. Keep doing this drawing/offset/check until the lines look unbroken when the image is offset. Make the image into a pattern by clicking edit/define pattern.
Make a second pattern in the same way, except draw the lines from the left edge to the right edge instead of the top edge to the bottom edge. Make sure you use different dimensions than you did on the first image. Again, oddball numbers work better because the repitition of lines is less obvious.
Go back to the main picture and make sure you're on the black layer. on the layer palette click the "create a new fill or adjustment layer" button (at the bottom of the layer palette - it looks like a half-black, half-white circle) and choose "pattern." Choose one of the patters you just created, and set the size of the pattern small enough to look like pencil lines. Factors of two work best, but don't be afraid to use oddball percentages to make the lines the right size.

Set the pattern layer's blend mode to Multiply and adjust the layer's Underlying Layer slider (like you did for the all black layer) until the lines fill only where you want them. NOTE: the white triangle is actually two sliders- to seperate them, hold down the ALT key when you click.

On the layer palette, click the black layer. Create another pattern layer using the other pattern you made, and adjust it in the same way to get the other half of the cross-hatch lines:

Final step: in the layer palette, choose the top layer. make a new adjustment layer (the black & white circle) and choose Threshold. Adjust the threshold level to whatever looks good to you (I used 150), and you are done!

Optional steps (actually, it's all pretty optional- nobody's forcing you to do this):
If you mask off areas and use different patterns on different sections of the image, you can improve the "looks-like-a-drawingness" of the image:

You can also color the image by making a top layer with the colors and setting the layer's blend mode to Multiply:

Questions? Comments? Feel free to email me- but before you do, check out Deke McClelland's original tutorial- it will probably answer your questions.
BONUS: Too lazy to make your own seamless patterns? Steal mine!
Fake sketch seamless line patterns
Sources
Original Tutorial:
http://www.microsoft.com/windowsxp/using/digitalphotography/prophoto/lineart.mspx
Source Image:
http://www.sxc.hu/photo/682858